
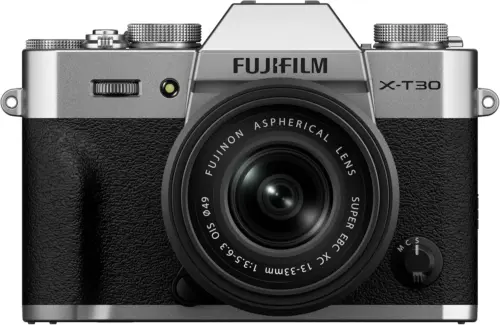
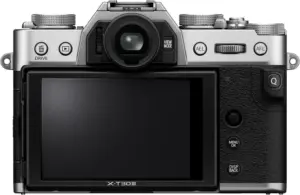
Film photography uses light-sensitive film instead of a digital sensor to capture photographs. You take your pictures on a roll of film, have it developed and then receive prints or digital scans of the images.
For beginners, 35mm film is a sensible place to start. Cameras are available in different styles, film comes in several speeds and colours, and processing services are available across the UK.
You don’t need an expensive camera to get started. What matters is choosing equipment that works, using film that suits the lighting and knowing how to load and handle it properly.
This guide covers everything from buying your first camera and choosing Kodak film to taking photographs, avoiding common mistakes and getting your finished pictures back from a film lab.
What Is Film Photography and How Does It Work?
Film photography records images on photographic film coated with chemicals that react to light. When you press the shutter button, light passes through the camera lens and exposes a small section of the film.
The exposed film contains an image that isn’t normally visible until it has been chemically developed.
The process works in four stages:
- Loading: A roll of photographic film is placed inside a compatible camera.
- Exposure: Light enters through the lens when the shutter opens, recording an image on the film.
- Development: A photographic laboratory processes the film using suitable chemicals.
- Scanning or printing: The developed images are converted into digital files or printed as photographs.
Unlike a digital camera, a film camera generally doesn’t let you review each picture immediately. You have to wait until the roll is processed.
Film Photography vs Digital Photography
The main difference is how the image is recorded. Digital cameras use electronic image sensors, while film cameras record images on light-sensitive photographic material.
| Feature | Film photography | Digital photography |
| Image recording | Photographic film | Digital sensor |
| Image preview | Usually unavailable | Usually immediate |
| Number of photographs | Limited by film roll | Depends on storage |
| Image processing | Film development required | Digital processing |
| ISO | Normally fixed for the roll | Can change between shots |
| Ongoing costs | Film and processing | Usually no per-photo processing cost |
Film photography isn’t automatically better than digital photography. Both can produce excellent pictures.
Film may appeal to people who enjoy using older cameras, experimenting with different film stocks or working with a limited number of exposures.
What Is 35mm Film?
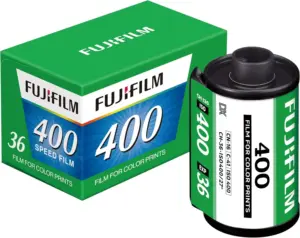
35mm film is photographic film measuring approximately 35 millimetres across its full width. It is commonly sold in light-tight cartridges labelled 135, which fit standard 35mm still cameras.
Most traditional 35mm cameras record images measuring approximately 36 × 24mm. The film itself is wider because it includes perforated edges that help the camera advance each frame.
24 vs 36 Exposures: Which Should You Choose?
A 24-exposure roll normally gives you 24 photographs, while a 36-exposure roll gives you 36.
Choose 24 exposures if you want to finish a roll quickly or are testing an unfamiliar camera. Choose 36 if you expect to take plenty of photographs and want to spread the processing cost across more frames.
Some cameras capture half-frame images, allowing roughly twice as many photographs from the same roll. The exact number can vary.
35mm vs 120 Film
35mm film and 120 film are different formats and aren’t interchangeable.
120 film is wider roll film used in medium-format cameras. Depending on the camera, it can produce larger negatives, such as 6 × 4.5cm or 6 × 6cm.
Larger negatives can preserve more image detail, particularly for substantial enlargements, but medium-format cameras are often bigger and take fewer pictures per roll.
For a beginner who wants an accessible, portable camera, 35mm is usually the easier starting point.
Types of 35mm Film Cameras: Which Is Best for Beginners?
A point-and-shoot camera is generally the easiest option for someone who wants to take pictures without learning manual settings. An SLR camera is better suited to someone interested in understanding exposure and focusing.
There are four common choices.
| Camera type | How it works | Advantages | Limitations |
| Point-and-shoot | Usually handles focusing and exposure automatically | Simple, compact and convenient | Limited manual control |
| SLR | Uses a mirror and viewfinder to show the image through the lens | Greater creative control and interchangeable lenses on many models | More settings to learn |
| Rangefinder | Uses a separate focusing system and viewfinder | Often compact and suitable for street photography | Manual focusing can take practice |
| Disposable camera | Comes with film already loaded | Easy way to try film photography | Limited controls and single-use design |
Point-and-Shoot Film Cameras
Point-and-shoot cameras are designed for convenience. Many automatically control exposure, focusing and film advance, although features differ between models.
They’re useful for family photographs, holidays and casual everyday shooting.
Before buying one, check that its autofocus, flash, battery compartment and film-loading mechanism work.
SLR Film Cameras
An SLR, or single-lens reflex camera, lets you compose photographs through the taking lens using a mirror and optical viewfinder.
Many models provide manual control over shutter speed, aperture and focusing. Some later SLR cameras also offer autofocus and automatic exposure.
An SLR is a good choice if you want to understand how different camera settings affect your photographs.
Rangefinder Film Cameras
A rangefinder camera usually uses a separate optical viewfinder with a focusing mechanism that helps align the subject.
These cameras can be useful for street photography and travel. However, some require more practice to focus accurately, particularly at close distances.
Disposable Film Cameras
Disposable cameras come with film already loaded, so you can begin taking photographs without purchasing a separate reusable camera.
For example, the Kodak Fun Saver disposable camera is one of the single-use photography products listed by Kapra Falconeri.
Disposable cameras are convenient for parties, weddings and occasional trips, but they’re not a practical long-term replacement for a reusable camera.
How to Choose Your First 35mm Film Camera
Choose a camera that works reliably, accepts readily available 35mm film and has controls you feel comfortable using. A fully working basic camera is more useful to a beginner than an expensive model with mechanical problems.
You don’t need to buy the most popular vintage camera. Condition matters more than reputation alone.
What to Check Before Buying a Second-Hand Film Camera
Inspect the following before purchasing:
- Shutter: Does it open and close correctly at different settings?
- Lens: Are there signs of fungus, heavy haze, scratches or internal damage?
- Light seals: Is the foam around the camera back intact rather than sticky or crumbling?
- Film advance: Does the winding mechanism operate smoothly?
- Light meter: Does it respond to changes in lighting?
- Battery compartment: Are the contacts clean and free from corrosion?
- Viewfinder: Can you see clearly through it?
- Camera back: Does it close securely without damage?
- Rewind mechanism: Can the film be rewound properly?
- Test photographs: Can the seller provide photographs taken with that particular camera?
Some older cameras require batteries that are difficult to replace or need suitable adapters. Check compatibility before buying.
If possible, purchase from a seller who has tested the camera with film and offers a reasonable return policy.
A shutter that fires without film does not prove the camera will produce correctly exposed photographs.
What Are the Different Types of 35mm Film?
The three main types are colour negative film, black-and-white film and colour reversal film. Each produces a different photographic result and may require a different developing process.
Colour Negative Film
Colour negative film produces a negative image that can be scanned or printed in natural colours.
It is a practical choice for beginners because common colour negative stocks can tolerate some exposure variation and are widely supported by UK photographic laboratories.
Most standard colour negative films, including Kodak Gold 200, UltraMax 400 and Ektar 100, use the C-41 development process.
Black-and-White Film
Black-and-white film records photographs in tones ranging from white through grey to black.
It is useful for portraits, architecture, street photography and scenes where shape, texture and contrast are particularly important.
Traditional black-and-white films require appropriate black-and-white processing, although some specialist black-and-white films are designed for C-41 processing.
Always check the film’s processing requirements.
Colour Reversal or Slide Film
Colour reversal film produces a positive image on the developed film rather than a conventional colour negative.
It can produce striking colours, but exposure accuracy is particularly important. Common slide films generally require E-6 processing, which is not available at every photographic laboratory.
For your first few rolls, colour negative film is usually the simpler option.
What Does ISO Mean in Film Photography?
ISO indicates how sensitive photographic film is to light. Higher ISO film generally needs less light to produce an exposure, while lower ISO film is better suited to brighter conditions.
Film speed affects the exposure settings you can use.
| Film ISO | Suitable conditions | What to expect |
| ISO 100 | Bright daylight, sunny landscapes | Fine grain and good detail |
| ISO 200 | Daylight, outdoor portraits, travel | Good balance of detail and everyday use |
| ISO 400 | Cloudy weather, changing light, general photography | Greater flexibility in lower light |
| ISO 800 | Lower-light conditions and situations needing faster shutter speeds | More light sensitivity, with grain depending on the film stock |
Moving from ISO 200 to ISO 400 represents one stop of additional film sensitivity. Under otherwise identical conditions, ISO 400 needs half as much light for the same nominal exposure.
This can help when photographing moving subjects or shooting in the UK’s frequently overcast weather.
However, ISO 400 film does not guarantee good photographs indoors or at night. You may still need a flash, wider aperture, slower shutter speed or additional lighting.
Important: Unlike a digital camera, changing the ISO dial on a film camera does not change the film’s actual sensitivity.
Normally, you should set the camera or light meter to match the ISO printed on your film cartridge. Some automatic cameras read this information through DX coding on the cartridge.
Best 35mm Film for Beginners: Kodak Gold 200 vs UltraMax 400 vs Ektar 100
Kodak Gold 200 and UltraMax 400 are both sensible beginner choices. Gold 200 works particularly well in bright daylight, while UltraMax 400 provides greater flexibility when lighting changes.
Kodak Ektar 100 is worth considering when fine detail and vivid colour are more important than low-light flexibility.
Kodak Film Comparison
| Film | ISO | Colour characteristics | Best suited to | Main consideration |
| Kodak Gold 200 | 200 | Warm, saturated colours | Sunny days, travel and outdoor portraits | Needs more light than ISO 400 |
| Kodak UltraMax 400 | 400 | Bright colours and natural-looking skin tones | Everyday photography and changing daylight | Still needs enough light indoors |
| Kodak Ektar 100 | 100 | Highly saturated colours and exceptionally fine grain | Landscapes, architecture and bright outdoor scenes | Less flexibility in low light |
Kodak Gold 200: A Good Choice for Daylight Photography
Kodak Gold 200 is a colour negative film designed for general photography in daylight or with electronic flash.
Its colour reproduction makes it suitable for holiday photographs, outdoor portraits and everyday scenes.
If most of your photographs will be taken outside on bright days, Kodak Gold 200 35mm film is a practical starting option.
For indoor photography, remember that additional light may be necessary.
Kodak UltraMax 400: More Flexible for Everyday Shooting
Kodak UltraMax 400 is a colour negative film designed to handle a wider variety of everyday lighting conditions.
Its ISO 400 rating gives you an advantage over ISO 200 when the light becomes weaker or you need a faster shutter speed.
That makes Kodak UltraMax 400 35mm film a useful option for outings, cloudy weather, outdoor portraits and general photography.
It is not a substitute for proper lighting, especially in dim rooms.
Kodak Ektar 100: Fine Grain and Vivid Colours
Kodak Ektar 100 is a low-speed colour negative film known for its very fine grain, strong colour saturation and sharp image reproduction.
It can be particularly effective for landscapes, architectural details and colourful outdoor scenes.
Because it has an ISO rating of 100, it is less convenient when lighting conditions change rapidly.
Choose Kodak Ektar 100 35mm film if you expect to shoot mainly in bright conditions and want to experiment with fine grain and vivid colour.
Which should you buy first? Choose Gold 200 for bright daylight or UltraMax 400 for greater flexibility. Ektar 100 is a worthwhile option once you have a clearer idea of the photographic results you prefer.
Remember that final colours also depend on exposure, processing and scanning. Two laboratories can produce different-looking scans from the same negatives.
How to Load 35mm Film into a Camera
To load 35mm film, insert the cartridge into the camera, attach the film leader to the take-up mechanism and advance the film according to the camera’s instructions.
Loading methods vary, particularly between manual and automatic cameras. Always check the manual for your specific model.
Step-by-Step: Loading a Manual 35mm Camera
- Find a shaded area. Avoid loading film in strong direct sunlight.
- Open the camera back. On many manual cameras, this is done by lifting the rewind knob.
- Insert the film cartridge. Place it securely in the designated chamber.
- Pull out the film leader. Extend only enough film to reach the take-up spool.
- Attach the leader. Follow the camera’s instructions for engaging the take-up spool and sprocket teeth.
- Advance the film carefully. Check that the leader moves correctly before closing the back.
- Close the camera securely. Make sure it latches without forcing it.
- Advance to the first frame. Follow the camera’s frame-counter instructions, usually by taking the required blank exposures.
On many manually wound cameras, the rewind knob turns as the film advances. This can help confirm that the film is moving through the camera.
Some automatic point-and-shoot cameras load film themselves after the back is closed. Don’t attempt to manually attach film in a camera designed for automatic loading.
How Do You Know the Film Is Loaded Correctly?
Film is likely loaded correctly when the camera advances it normally and its film movement indicators behave as described in the manual.
On many manual cameras, the rewind knob rotates during winding once the slack has been taken up.
If the film counter moves but the rewind knob never turns, the leader may not have engaged correctly. Check the camera’s instructions before continuing.
Incorrect loading can result in an entire roll with no photographs.
How Do You Rewind 35mm Film?
Manual 35mm cameras generally require you to release the film transport mechanism and rewind the exposed film into its cartridge before opening the camera back.
Once you reach the end of the roll:
- Stop advancing the film if you feel resistance.
- Press the rewind-release button if your camera has one.
- Turn the rewind crank in the direction shown on the camera.
- Continue until the film is fully inside the cartridge.
- Open the camera and remove the cartridge.
Automatic cameras usually rewind the film electronically.
Never open the camera back while exposed film remains outside its cartridge. Light can damage or destroy photographs that have not yet been developed.
How to Take Better Photographs on 35mm Film
Good film photographs depend on sufficient light, accurate focusing and suitable exposure settings. Getting these basics right matters more than buying an expensive camera.
Understanding Aperture and Shutter Speed
Aperture controls how much light passes through the lens, while shutter speed controls how long that light reaches the film.
A wider aperture, such as f/2.8, allows more light through than f/8. It can also produce a shallower depth of field, leaving backgrounds more blurred.
A fast shutter speed, such as 1/500 second, helps reduce motion blur. A slower shutter speed, such as 1/30 second, lets in more light but increases the risk of camera shake.
For cameras with manual settings, you need a suitable combination of aperture, shutter speed and film ISO.
If your camera includes a working light meter, use its guidance. Otherwise, a reliable external meter can help.
Focusing and Composition
Focus on the most important part of the scene. For portraits, that is often the subject’s eyes.
Before pressing the shutter, check the edges of your frame for unwanted objects. Keep your fingers away from the lens and make sure the lens cap has been removed.
If your camera has a separate optical viewfinder, remember that the image you see may not match the exact view through the lens, particularly at close distances.
Taking Photographs in Different Lighting Conditions
Bright daylight is generally the easiest situation for beginners.
For cloudy conditions, ISO 400 film can offer additional exposure flexibility.
When photographing indoors, use available window light or a suitable flash if necessary. Avoid assuming that a room is bright enough simply because your eyes can see comfortably.
If you’re unsure about your camera’s behaviour, make your first roll a simple daylight test rather than starting with an important event.
Common Film Photography Problems and How to Fix Them
Most disappointing first-roll results come from exposure mistakes, focusing problems, camera faults or incorrect film handling.
The appearance of the developed negatives can help identify what went wrong.
| Problem | Possible cause | What to do next |
| Photographs are too dark | Insufficient exposure | Use more light, a wider aperture or a suitable slower shutter speed |
| Photographs are blurry | Camera shake, subject movement or incorrect focus | Check focus and use a faster shutter speed where possible |
| Entire roll is blank | Film failed to advance, severe underexposure or processing problems | Ask the laboratory to inspect the negatives and film-edge markings |
| Orange or red streaks | Light entering the camera unintentionally | Inspect the camera back and light seals |
| Film won’t advance | Incorrect loading, mechanical problems or end of roll | Stop forcing the lever and consult the manual |
| Photographs have scratches | Damage during film transport or handling | Inspect the camera’s film path and ask the lab to examine the negatives |
| Colours look unusual | Film stock, exposure, processing or scanning differences | Compare scans with negatives and ask the lab about corrections |
If several frames show the same problem, avoid immediately blaming the film stock.
A camera fault can affect an entire roll.
If your pictures are unsatisfactory, keep the negatives. A photographic laboratory may be able to identify whether the problem occurred during exposure, development or scanning.
For second-hand cameras, a test roll is particularly useful before taking photographs that cannot be repeated.
How to Develop and Scan 35mm Film in the UK
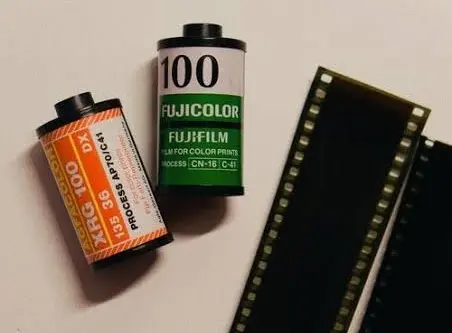
35mm film can be developed through photographic laboratories offering in-person drop-off or postal services across the UK. You send or hand over the exposed roll, choose a suitable service and receive processed negatives, scans or prints.
You don’t need to develop film at home.
What Happens During Film Development?
Film development uses controlled chemical processes to make the exposed images visible and stable.
The correct process depends on the film.
| Film type | Usual processing method |
| Standard colour negative film | C-41 |
| Traditional black-and-white film | Black-and-white chemistry |
| Colour reversal or slide film | E-6 |
Kodak Gold 200, UltraMax 400 and Ektar 100 are standard C-41 colour negative films.
After development, a laboratory can scan the negatives into digital image files or use them to produce photographic prints.
How Much Does Film Developing Cost in the UK?
Film-processing costs depend on the type of film, scan resolution, selected services and postage.
For a real example, Exposure Film Lab’s published price list showed these 35mm develop-and-scan prices when checked in November 2026:
| Processing service | Published example price |
| C-41 colour negative with medium scans | £12 |
| Traditional black-and-white with medium scans | £15 |
| E-6 slide film with medium scans | £18 |
These are examples from one UK laboratory, not national average prices. Charges may change, and additional services or postage may cost extra.
Before placing an order, check the current pricing on the Exposure Film Lab website.
How to Choose a Film Processing Laboratory
Choose a laboratory that handles your film format and processing type.
Before sending a roll, check:
- Whether the lab accepts 35mm film.
- Whether it offers C-41, black-and-white or E-6 processing as required.
- Whether scanning is included.
- What scan resolutions and file formats are available.
- Whether negatives will be returned.
- The expected turnaround time.
- Return postage and additional charges.
- Recent customer reviews and available sample results.
For your first roll, development with digital scans is convenient because you can view and share your photographs without needing your own film scanner.
Keep your original negatives after processing. They may be useful for future rescanning or printing.
How Much Does It Cost to Start Film Photography?
Your starting cost depends on the camera you choose, the film you buy and the processing service you use.
A reusable second-hand camera has an upfront cost, while every subsequent roll normally requires film and development.
To understand the running cost, calculate:
Cost per photograph = (film price + development + scanning + postage) ÷ usable exposures
For example, if a roll costs £10 and development with scans costs £12, your total is £22 before postage.
On a 36-exposure roll, that works out to approximately 61p per frame, assuming all 36 exposures are usable.
The £10 film price here is only an illustrative figure, not a verified retail quotation.
A 36-exposure roll can sometimes provide better processing value per frame than a 24-exposure roll because many laboratories charge per roll rather than per photograph.
Remember to account for failed exposures, camera batteries and any additional prints.
How Should You Store and Protect 35mm Film?
Store unused photographic film in a cool, dry place, away from direct sunlight, excessive heat and moisture. Keep it in its original sealed packaging until needed.
Heat and poor storage conditions can affect film quality over time.
Check the manufacturer’s storage recommendations and the expiry date printed on the packaging.
If film has been refrigerated, allow the sealed package to reach room temperature before opening it. This helps reduce the risk of condensation.
After shooting, arrange development reasonably promptly rather than leaving exposed film in a hot car or warm cupboard for months.
Can Airport Scanners Damage 35mm Film?
Yes. Certain airport security scanners, particularly computed tomography (CT) scanners, can damage unprocessed photographic film.
Kodak Alaris advises keeping unexposed and exposed-but-unprocessed film out of CT scanners.
When travelling:
- Keep film in your hand luggage rather than checked baggage.
- Place the cartridges in a clear, resealable plastic bag.
- Ask security staff for a manual inspection before scanning.
- Check the airport’s film-inspection policy before travelling.
Manual inspection is not guaranteed at every airport.
If suitable inspection cannot be arranged, consider buying and developing film at your destination.
These precautions apply to unprocessed film. Once film has been properly developed, its images are no longer vulnerable to airport scanners in the same way.
For manufacturer guidance, read Kodak’s film and CT scanning advice.
Your First Roll of Film: A Practical Checklist
For your first roll, keep the process straightforward: use a functioning camera, choose suitable film, shoot in reliable lighting and send the roll to a reputable lab.
Before shooting:
- Confirm that your camera accepts 35mm film.
- Check the camera’s shutter, battery and film advance.
- Choose ISO 200 or 400 colour negative film for general daylight photography.
- Load the film according to your camera’s manual.
- Confirm the film is advancing correctly.
- Set or confirm the correct film ISO.
- Choose scenes with plenty of natural light.
While shooting:
- Check your focus before taking each photograph.
- Keep the camera steady.
- Avoid accidentally covering the lens.
- Use flash where necessary and appropriate.
- Don’t force the film advance when you reach the end of the roll.
After shooting:
- Rewind the film fully if required.
- Remove the cartridge only when it is safe.
- Keep the exposed film cool and dry.
- Select the correct processing service.
- Request digital scans and retain the negatives.
You don’t need every photograph to be perfect. Your first roll will help you understand how your particular camera behaves.
Frequently Asked Questions About 35mm Film Photography
Is Film Photography Good for Beginners?
Yes. Film photography is suitable for beginners, particularly when using an automatic 35mm camera or a reliable SLR with straightforward controls.
Starting with daylight photographs and common colour negative film makes the learning process easier.
Can You Use 35mm Film in Any Film Camera?
No. A camera must be designed to accept 35mm film cartridges.
120, 110 and instant-film cameras use different formats, so always check compatibility before purchasing.
How Many Pictures Can You Take on One Roll of 35mm Film?
A standard roll usually provides 24 or 36 photographs, depending on its labelled exposure count.
Half-frame cameras can produce roughly twice as many smaller images on the same length of film.
Can You Change Film ISO Halfway Through a Roll?
You can change the camera’s ISO setting on some models, but doing so does not alter the actual sensitivity of the film already loaded.
For consistent results, use the correct ISO setting unless you are deliberately applying a considered exposure technique.
Can You Still Use Expired 35mm Film?
Yes, expired film can sometimes produce usable photographs, but the results are less predictable.
Age, storage temperature and film type all affect how well it performs. Fresh film is a more dependable choice for beginners learning exposure.
Can You Develop 35mm Film at Home?
Yes. With the correct equipment, chemicals, light-tight handling arrangements and safety precautions, you can develop certain types of photographic film at home.
For a beginner who simply wants to see their photographs, a professional film lab is often the easier option.
Does a Film Camera Need Batteries?
Some film cameras work mechanically without batteries, while others require batteries for the shutter, meter, autofocus or film transport.
Check the specifications of the exact camera model before buying it.
Getting Started with 35mm Film Photography
You can begin film photography with a reliable 35mm camera, a suitable roll of film and a plan for getting it developed.
Start by choosing the type of camera you want to use. A point-and-shoot is convenient for casual photography, while an SLR offers more opportunities to learn manual controls.
For film, Kodak Gold 200 is a practical option for bright outdoor conditions. Kodak UltraMax 400 gives you more flexibility in changing daylight. Ektar 100 suits photographers looking for fine grain and vivid colours in brighter scenes.
Take your time loading the film, pay attention to available light and make sure the roll advances correctly. Once you’ve finished, have it processed and study the results.
The first roll is an opportunity to learn what works and what needs improving.
Looking for Kodak film for your retail business?
Kapra Falconeri supplies photography and consumer technology products to UK trade buyers. Retailers and resellers can explore the Kodak wholesale product range or open a trade account to enquire about relevant products and pricing.



💬 Join the Discussion